 Her Happy Kitchen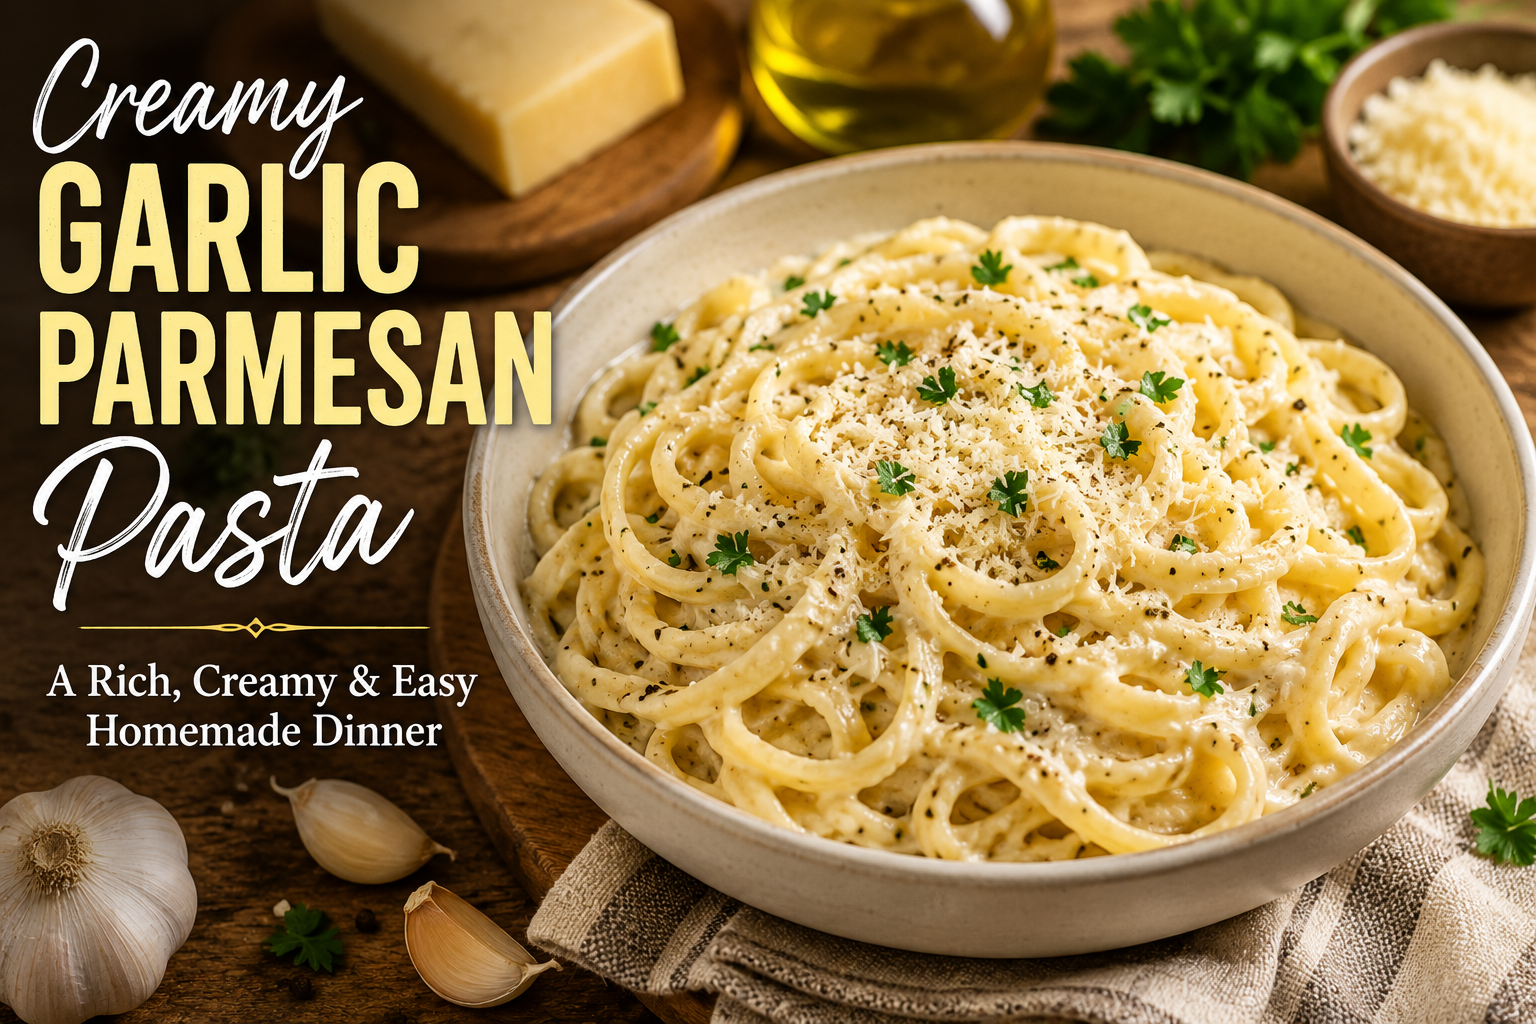
CREAMY GARLIC PARMESAN PASTA
Creamy Garlic Parmesan Pasta is one of those comforting homemade meals that feels special but is surprisingly easy to prepare. With tender pasta coated in a smooth, creamy garlic Parmesan sauce, this recipe is perfect for busy weeknights, cozy dinners, family meals, or whenever you are craving something rich and satisfying.
The best thing about this pasta is its simple combination of ingredients. You do not need complicated cooking techniques or hard-to-find ingredients to make a delicious bowl of creamy pasta at home. Pasta, garlic, butter, cream, Parmesan cheese, and a few seasonings come together to create a flavorful sauce that coats every piece of pasta beautifully.
This recipe can also be customized in many different ways. You can add vegetables, herbs, mushrooms, or cooked chicken to make the meal more filling. You can also adjust the amount of garlic, Parmesan, or seasoning according to your taste.
WHY YOU WILL LOVE THIS CREAMY GARLIC PARMESAN PASTA
There are many reasons this pasta deserves a place in your regular dinner rotation.
First, it is incredibly comforting. The creamy sauce combined with garlic and Parmesan creates a warm and satisfying flavor that makes every bite delicious.
Second, the recipe is simple. Even if you are not an experienced cook, you can prepare this pasta by following a few straightforward steps.
Third, it is versatile. You can serve it as a main course or pair it with garlic bread, salad, roasted vegetables, or another favorite side dish.
Fourth, the recipe is easy to customize. You can make it vegetarian, add protein, include vegetables, or change the seasonings to create your own version.
INGREDIENTS YOU WILL NEED
Pasta – Use your favorite pasta shape. Spaghetti, fettuccine, penne, linguine, and bow-tie pasta all work well.
Butter – Butter adds richness to the sauce and helps gently cook the garlic.
Garlic – Freshly minced garlic provides the main savory flavor. For the best taste, use fresh garlic instead of garlic powder whenever possible.
Heavy cream – Heavy cream creates the smooth and creamy base of the sauce.
Parmesan cheese – Freshly grated Parmesan melts into the sauce and gives it a delicious cheesy flavor.
Salt – Salt enhances the flavors of the pasta and sauce.
Black pepper – Freshly ground black pepper adds a mild spicy note.
Italian seasoning – A small amount of Italian seasoning adds extra herbal flavor.
Parsley – Fresh parsley gives the finished pasta a fresh taste and attractive appearance.
Pasta water – Reserved pasta water is extremely useful for adjusting the consistency of the sauce.
HOW TO CHOOSE THE RIGHT PASTA
Choosing the right pasta can make a difference in the final dish.
Long pasta such as spaghetti, linguine, or fettuccine works especially well with creamy sauces because the sauce wraps around the noodles.
Short pasta such as penne or fusilli is also a great choice. The shapes and ridges can hold small amounts of sauce, giving you plenty of flavor in every bite.
Fettuccine is particularly suitable if you want a restaurant-style creamy pasta because its wide shape works beautifully with rich sauces.
However, there is no strict rule. The most important thing is to use pasta that you enjoy.
HOW TO COOK THE PASTA
Begin by bringing a large pot of water to a boil.
Add salt to the water and then add the pasta.
Cook the pasta according to the package instructions until it reaches an al dente texture. Al dente means the pasta should be cooked through while still having a slight firmness when you bite it.
Avoid overcooking the pasta because it will continue to soften slightly when combined with the hot sauce.
Before draining the pasta, reserve some of the pasta cooking water.
This step is important because pasta water contains starch that can help loosen the sauce and make it smoother.
Drain the pasta and set it aside.
PREPARING THE GARLIC PARMESAN SAUCE
While the pasta is cooking, you can prepare the sauce.
Place a large skillet over medium-low heat.
Add butter and allow it to melt gently.
Add the minced garlic and cook it for a short time until fragrant.
Be careful not to burn the garlic. Burnt garlic can become bitter and overpower the creamy sauce.
Once the garlic is fragrant, reduce the heat slightly and add the heavy cream.
Stir gently so that the butter, garlic, and cream combine.
Allow the mixture to warm gradually.
Do not rush this step by using extremely high heat. A gentle cooking temperature helps create a smoother sauce.
ADDING THE PARMESAN CHEESE
Once the cream is warm, gradually add freshly grated Parmesan cheese.
Stir continuously as the cheese melts.
The Parmesan should blend into the cream and create a smooth, rich sauce.
If the sauce becomes too thick, add a small amount of reserved pasta water and stir.
Continue adding pasta water little by little until you reach the consistency you prefer.
The sauce should be creamy enough to coat the pasta without becoming extremely thick.
COMBINING THE PASTA AND SAUCE
Add the cooked pasta directly to the skillet containing the sauce.
Use tongs or a large spoon to gently toss the pasta.
Make sure the creamy sauce coats the pasta evenly.
If the pasta appears too dry, add another small splash of reserved pasta water.
Continue tossing until the sauce becomes silky and evenly distributed.
Taste the pasta and adjust the seasoning if necessary.
Add black pepper, Italian seasoning, or a little additional Parmesan according to your preference.
FINISHING THE PASTA
Once everything is combined, turn off the heat.
Add freshly chopped parsley over the top.
You can also add a little extra grated Parmesan before serving.
Serve the pasta immediately while the sauce is warm and creamy.
For an attractive presentation, place the pasta in a serving bowl and sprinkle Parmesan and parsley over the top.
TIPS FOR MAKING THE BEST CREAMY GARLIC PARMESAN PASTA
Use freshly grated Parmesan whenever possible. It generally melts more smoothly than pre-shredded cheese.
Do not burn the garlic. Garlic should become fragrant and lightly cooked, not dark brown.
Cook the pasta until al dente. Overcooked pasta can become soft and may not hold the sauce as well.
Always reserve some pasta water. It can help adjust the sauce and improve the final texture.
Add Parmesan gradually rather than dumping all of it into the sauce at once.
Keep the heat moderate while making the sauce. Excessive heat can affect the texture of a creamy cheese sauce.
Serve the pasta immediately for the best texture and flavor.
CREAMY GARLIC PARMESAN PASTA VARIATIONS
One of the best things about this recipe is how easily you can change it.
CHICKEN GARLIC PARMESAN PASTA
Add sliced or chopped cooked chicken to the finished pasta.
Season the chicken with salt, black pepper, and Italian seasoning before cooking.
Once cooked, combine it with the creamy pasta sauce.
This creates a more filling meal that is perfect for lunch or dinner.
MUSHROOM GARLIC PARMESAN PASTA
Sauté sliced mushrooms in butter until tender and lightly browned.
Prepare the creamy garlic Parmesan sauce and add the mushrooms before mixing in the pasta.
The earthy flavor of mushrooms pairs wonderfully with garlic and Parmesan.
SPINACH PARMESAN PASTA
Fresh spinach can be added toward the end of cooking.
Allow the spinach to wilt gently into the warm sauce.
It adds color and a mild fresh flavor to the dish.
BROCCOLI GARLIC PARMESAN PASTA
Cook small broccoli florets until tender but still slightly firm.
Add them to the creamy pasta before serving.
The combination of broccoli, garlic, cream, and Parmesan makes a comforting family meal.
SPICY GARLIC PARMESAN PASTA
If you enjoy a little heat, add red pepper flakes to the garlic while preparing the sauce.
Start with a small amount and increase it according to your preferred level of spiciness.
WHAT TO SERVE WITH CREAMY GARLIC PARMESAN PASTA
This pasta can be served on its own, but several side dishes pair beautifully with it.
Garlic bread is one of the easiest choices. The crispy bread is perfect for enjoying any remaining creamy sauce.
A simple green salad can provide a fresh contrast to the rich pasta.
Roasted vegetables such as broccoli, carrots, zucchini, or bell peppers can also be served alongside the dish.
For a complete dinner, serve the pasta with a light salad and warm garlic bread.
HOW TO STORE LEFTOVER PASTA
If you have leftovers, allow the pasta to cool and place it in an airtight container.
Store it in the refrigerator and enjoy it within a reasonable time.
Cream-based sauces can thicken after refrigeration, so the pasta may not look as creamy when cold.
HOW TO REHEAT CREAMY PASTA
Reheat the pasta gently over low to medium heat.
Add a small splash of milk, cream, or water while reheating.
Stir gently until the sauce becomes smooth again.
Avoid overheating the pasta because excessive heat can cause the sauce to become too thick or separate.
FINAL THOUGHTS
Creamy Garlic Parmesan Pasta is a simple recipe that delivers a rich and comforting homemade meal without requiring complicated ingredients.
The combination of buttery garlic, creamy sauce, Parmesan cheese, tender pasta, and fresh herbs creates a dish that is easy enough for a weeknight dinner but delicious enough for a special meal.
Once you learn the basic method, you can experiment with different pasta shapes, vegetables, proteins, herbs, and seasonings to create your own favorite version.
The key is to cook the pasta properly, prepare the sauce gently, use good-quality Parmesan, and adjust the consistency with reserved pasta water.
With these simple techniques, you can make creamy garlic Parmesan pasta at home whenever you want a warm, satisfying, and flavorful dinner.
THE ULTIMATE HOMEMADE CHOCOLATE CAKE
A homemade chocolate cake is one of the most comforting desserts you can prepare in your kitchen. A soft chocolate cake covered with smooth chocolate frosting can turn an ordinary day into something special. While chocolate cake may look complicated, the basic method is actually quite simple once you understand the role of each ingredient and follow the correct steps.
In the first part, we covered the basic foundation of making a delicious homemade chocolate cake. In this second part, we will go deeper into the preparation process, frosting, decorating ideas, common mistakes, and helpful techniques that can make your cake softer, richer, and more enjoyable.
PREPARING THE CAKE BATTER
Before beginning, make sure all of your ingredients are measured properly. Baking is different from everyday cooking because small changes in ingredient quantities can affect the final texture.
Prepare your cake pans before mixing the batter. Grease the inside of the pans lightly and line the bottoms with parchment paper if available. This makes removing the finished cake much easier.
In a large mixing bowl, combine the dry ingredients.
These can include all-purpose flour, unsweetened cocoa powder, baking powder, baking soda, and a small amount of salt.
Whisk the dry ingredients together thoroughly.
This step helps distribute the cocoa powder and raising agents evenly throughout the flour.
In another bowl, combine the wet ingredients.
Depending on the recipe, these may include eggs, sugar, milk, vanilla extract, melted butter or oil, and other liquid ingredients.
Mix the wet ingredients until they are well combined.
Gradually add the dry mixture to the wet mixture.
Do not mix aggressively for a long time. Overmixing can develop too much gluten in the flour and may result in a cake that is less tender.
Mix only until the ingredients are combined and the batter looks smooth.
THE ROLE OF COCOA POWDER
Cocoa powder gives chocolate cake its characteristic chocolate flavor and deep color.
For the best result, use good-quality unsweetened cocoa powder.
Cocoa powder can sometimes form small lumps, so it is helpful to sift it together with the flour and other dry ingredients.
Sifting also helps create a lighter mixture and makes it easier to combine the ingredients evenly.
If you want a stronger chocolate flavor, you can increase the chocolate character with additional chocolate ingredients, but always follow the proportions of the recipe carefully.
ADDING HOT LIQUID
Some chocolate cake recipes use hot water or hot coffee as part of the batter.
The purpose is not necessarily to make the cake taste like coffee. Instead, hot liquid can help bring out the flavor of cocoa powder and create a smoother batter.
If coffee is used, choose a mild variety. The finished cake can still taste primarily like chocolate.
Add the hot liquid gradually while mixing carefully.
The batter may become thinner than you expect. Do not worry if the recipe is designed this way. A thinner chocolate cake batter can produce a very moist finished cake.
BAKING THE CAKE
Preheat your oven before placing the cake inside.
A properly preheated oven allows the cake to begin baking at the correct temperature immediately.
Pour the batter evenly between the prepared cake pans.
Gently tap the pans on the counter once or twice if necessary to release large air bubbles.
Place the pans in the center area of the oven.
Avoid opening the oven repeatedly during the early stages of baking. Sudden temperature changes can interfere with the cake’s rise.
Bake according to the recipe instructions and your oven’s characteristics.
Because ovens can vary, begin checking the cake toward the end of the recommended baking time.
HOW TO KNOW WHEN THE CAKE IS DONE
One of the easiest ways to check a chocolate cake is with a toothpick or cake tester.
Insert it into the center of the cake.
If it comes out with a few moist crumbs attached, the cake is generally ready.
If it comes out covered in wet batter, the cake needs more time.
You can also gently press the center of the cake. A properly baked cake should spring back lightly.
Do not rely only on the appearance of the top because chocolate cakes can sometimes look finished before the center has fully baked.
COOLING THE CAKE
Cooling is one of the most important steps.
Once the cake comes out of the oven, allow it to rest in the pan for several minutes.
After that, carefully remove it from the pan and place it on a cooling rack.
Allow the cake to cool completely before applying frosting.
Do not frost a hot cake.
Warm cake can melt the frosting and make it slide off the surface.
If you are in a hurry, allow the cake to cool at room temperature first and then place it in the refrigerator for a short period.
MAKING A SIMPLE CHOCOLATE FROSTING
A rich chocolate cake becomes even more delicious when covered with creamy chocolate frosting.
A simple frosting can be made with butter, powdered sugar, cocoa powder, vanilla extract, and a small amount of milk or cream.
Start by beating softened butter until it becomes smooth.
Add cocoa powder and powdered sugar gradually.
Mix slowly at first to prevent powdered sugar from spreading everywhere.
Add vanilla extract for extra flavor.
Then add milk or cream a little at a time until the frosting reaches your preferred consistency.
Continue beating until the frosting becomes smooth and creamy.
The finished frosting should be easy to spread but firm enough to hold its shape.
HOW TO MAKE FROSTING EXTRA SMOOTH
The temperature of the butter is important.
Butter should be softened but not completely melted.
If the butter is too cold, it can make the frosting difficult to whip.
If it is too warm or melted, the frosting may become too loose.
Beat the butter first until smooth, then gradually incorporate the remaining ingredients.
If the frosting is too thick, add a small amount of milk.
If it is too thin, add a little more powdered sugar or cocoa powder.
Make adjustments gradually.
ADDING CHOCOLATE TO THE FROSTING
For a deeper chocolate flavor, melted chocolate can be incorporated into the frosting.
Allow melted chocolate to cool slightly before mixing it into the buttercream.
Chocolate that is extremely hot can soften the butter too much.
Once incorporated, beat the frosting until smooth.
This creates a richer chocolate frosting that works beautifully between cake layers and over the top of the cake.
ASSEMBLING THE CAKE
Once the cake layers are completely cool, place the first layer on a serving plate or cake board.
If the top of the cake is uneven, you can carefully level it with a cake knife.
Spread an even layer of chocolate frosting over the first cake layer.
Place the second cake layer on top.
Press gently without applying too much pressure.
Spread frosting over the top and sides of the cake.
For a simple homemade appearance, you do not need to make the surface perfectly smooth.
A slightly textured frosting finish can look beautiful and rustic.
CREATING A CRUMB COAT
If you want a cleaner professional-looking cake, use a crumb coat.
A crumb coat is a thin layer of frosting applied around the cake before the final layer.
Spread a very thin layer of frosting over the entire cake.
This layer traps loose cake crumbs.
Place the cake in the refrigerator for a short time to allow the crumb coat to firm up.
Then apply the final layer of frosting.
This simple technique can make the final cake look much cleaner.
DECORATING THE CHOCOLATE CAKE
You can decorate a chocolate cake in many different ways.
Keep the decoration simple with chocolate shavings and a light dusting of cocoa powder.
You can also add chocolate chips, chocolate curls, sprinkles, or chopped nuts.
Fresh berries can provide a beautiful contrast against the dark chocolate frosting.
Strawberries, raspberries, or cherries can work particularly well.
For birthdays and celebrations, you can pipe decorative frosting around the edges.
You can also add a simple chocolate drip around the top edge.
The decoration should match the occasion and your personal style.
CHOCOLATE GANACHE DRIP
A chocolate ganache drip can give a homemade cake a bakery-style appearance.
Prepare a smooth ganache using chocolate and warm cream.
Allow the ganache to cool until it becomes slightly thick but still flows.
Pour a small amount around the edge of the chilled cake.
Encourage the ganache to drip naturally down the sides.
Then spread some ganache over the center.
Do not use ganache while it is extremely hot because it can melt the frosting underneath.
HOW TO KEEP THE CAKE MOIST
One of the most common goals when making chocolate cake is achieving a moist texture.
Several factors contribute to this.
Do not overbake the cake.
Measure flour carefully.
Avoid adding excessive flour.
Use the correct amount of liquid.
Do not overmix the batter.
Allow the cake to cool properly before frosting.
Some chocolate cake recipes also use oil instead of butter because oil can contribute to a particularly moist texture.
WHY CAKES SOMETIMES BECOME DRY
A dry cake can happen for several reasons.
The most common is overbaking.
Even a few extra minutes can affect a delicate cake.
Another possibility is adding too much flour.
If flour is packed tightly into a measuring cup, you may accidentally use more than the recipe requires.
Incorrect oven temperature can also contribute to dryness.
Always follow the recipe carefully and use an oven thermometer if you frequently bake and want more accurate results.
WHY YOUR CAKE MAY SINK IN THE CENTER
A cake that sinks can be frustrating.
One possible reason is opening the oven door too early.
Another reason can be using too much raising agent.
Overmixing the batter can also affect the structure.
Underbaking is another common cause. If the center has not developed enough structure before the cake is removed from the oven, it may collapse as it cools.
Make sure the cake is properly baked before removing it.
WHY THE CAKE HAS A DENSE TEXTURE
A dense chocolate cake may result from overmixing, incorrect ingredient measurements, insufficient leavening, or an oven temperature that is too low.
When combining the dry and wet ingredients, mix only until everything is incorporated.
The batter does not need to be beaten aggressively.
This helps maintain a tender texture.
HOW TO GET EVEN CAKE LAYERS
If you are making a layered cake, divide the batter as evenly as possible between the pans.
Using a kitchen scale can make this easier.
Place the pans on the same oven rack if your oven allows it.
Rotate them only if necessary and only when the cake has developed enough structure.
After baking, allow the layers to cool completely.
If one layer has a slightly domed top, carefully level it before assembling the cake.
MAKING MINI CHOCOLATE CAKES
The same basic batter can often be adapted into smaller cakes or cupcakes.
For cupcakes, fill the liners only to the recommended level.
Do not overfill them because the batter will rise during baking.
Cupcakes generally require less baking time than a full cake, so begin checking them earlier.
Once cooled, decorate them with chocolate frosting, sprinkles, or small chocolate pieces.
MAKING A ONE-LAYER CHOCOLATE CAKE
If you want something simpler, prepare the cake in a single pan.
A one-layer chocolate cake requires less assembly and can still look beautiful.
Spread frosting across the top and add chocolate shavings or powdered sugar.
This is a great option when you want homemade dessert without spending too much time decorating.
ADDING NUTS
Chopped nuts can add texture to chocolate cake.
Walnuts, almonds, pecans, or hazelnuts can all work well.
You can mix a small amount directly into the batter or sprinkle them over the frosting.
If you prefer a smooth cake, keep the nuts only as a topping.
ADDING CHOCOLATE CHIPS
Chocolate chips can make the cake even more chocolatey.
Fold them gently into the batter near the end of mixing.
Do not overmix after adding them.
You can also sprinkle a small amount on top of the frosting.
BALANCING SWEETNESS
Chocolate desserts can become overly sweet if every component contains a large amount of sugar.
The cocoa powder and a small amount of salt can help balance sweetness.
Dark chocolate can also provide a deeper flavor compared with very sweet chocolate.
Taste your frosting before using it and adjust it if necessary.
Remember that the cake itself and the frosting will be eaten together, so the overall sweetness matters more than the sweetness of either component alone.
SERVING THE CAKE
Allow the assembled cake to rest for a short time before slicing.
Use a sharp knife for cleaner slices.
Wipe the knife between cuts if you want especially neat pieces.
Serve the cake at a comfortable temperature.
A slice of chocolate cake can be enjoyed with milk, coffee, tea, or another favorite beverage.
For an extra special dessert, serve it with fresh berries or a scoop of ice cream.
STORING HOMEMADE CHOCOLATE CAKE
Proper storage helps maintain the cake’s texture.
Keep the cake covered so that the exposed surface does not dry out.
Depending on the ingredients in your frosting and the temperature of your kitchen, the cake may be stored at room temperature for a limited period or refrigerated.
If refrigerated, allow the cake to sit at room temperature for a short time before serving if you prefer a softer frosting and texture.
Always follow food-safety guidance for dairy- or cream-based ingredients.
FREEZING CHOCOLATE CAKE
Chocolate cake can often be frozen successfully.
If you plan to freeze it, wrap the cake securely to protect it from freezer odors and drying.
Cake layers can be frozen separately before frosting.
Once completely cool, wrap each layer well and place it in a suitable freezer-safe container or wrapping.
When ready to use, allow the layers to thaw completely before frosting.
This can be a useful method when preparing a cake ahead of time for a special occasion.
FINAL TIPS FOR A BEAUTIFUL CHOCOLATE CAKE
Measure ingredients accurately.
Use good-quality cocoa powder and chocolate.
Do not overmix the batter.
Do not overbake the cake.
Allow the cake to cool completely before frosting.
Use softened butter for smooth frosting.
Add liquid gradually when adjusting frosting consistency.
Chill the cake briefly if you are working with multiple frosting layers.
Decorate according to the occasion.
Most importantly, do not worry about making the cake look perfectly professional. Homemade desserts are special because they are made with care.
CONCLUSION
The perfect homemade chocolate cake is all about balance. The cake should be soft and moist, the chocolate flavor should be rich, and the frosting should complement rather than overwhelm the cake.
With the right ingredients and careful preparation, you can create a delicious chocolate cake in your own kitchen.
Whether you make a simple one-layer cake, a beautiful layered cake, cupcakes, or a decorated celebration cake, the basic techniques remain the same.
Take your time, follow the measurements carefully, and give the cake enough time to cool before decorating.
Once you become comfortable with the basic recipe, you can experiment with different frostings, fillings, toppings, and decorations.
A classic chocolate cake is not just a dessert. It is a versatile recipe that can become part of birthdays, family celebrations, weekend baking, holidays, and simple moments when you want something sweet and comforting.
With practice, you can make this recipe your own and create a signature homemade chocolate cake that your family and guests will look forward to enjoying.
THE ULTIMATE HOMEMADE CHOCOLATE CAKE
CREATIVE WAYS TO CUSTOMIZE YOUR CHOCOLATE CAKE
One of the best things about a classic chocolate cake is how easily it can be transformed into different desserts. Once you understand the basic recipe, you can experiment with flavors, fillings, frostings, toppings, and decorations.
You do not have to follow the same combination every time. A simple chocolate cake can become a birthday cake, celebration cake, holiday dessert, afternoon treat, or elegant dinner dessert simply by changing the finishing touches.
CLASSIC CHOCOLATE CAKE
For a traditional version, keep the cake simple with two soft chocolate layers and a generous layer of chocolate frosting.
Spread frosting between the layers and cover the top and sides.
Finish with a light sprinkling of chocolate shavings.
This version is perfect when you want the chocolate flavor to remain the star of the dessert.
DOUBLE CHOCOLATE CAKE
If you love a stronger chocolate flavor, turn the cake into a double chocolate dessert.
Add chocolate chips to the batter and use a rich chocolate frosting.
You can also decorate the top with chocolate curls or small pieces of chocolate.
The combination of chocolate cake, chocolate pieces, and chocolate frosting creates an especially rich dessert.
TRIPLE CHOCOLATE CAKE
For an even more indulgent dessert, combine chocolate cake with chocolate filling and chocolate ganache.
The cake provides the base flavor, the filling adds another creamy layer, and the ganache creates a smooth finish.
This style of cake is especially suitable for celebrations.
CHOCOLATE STRAWBERRY CAKE
Chocolate and strawberries make a beautiful combination.
Prepare the chocolate cake and cover one layer with chocolate frosting.
Add thinly sliced fresh strawberries over the frosting.
Place the second cake layer on top and finish with chocolate frosting.
Decorate with whole or sliced strawberries.
The fresh fruit provides a bright contrast to the rich chocolate cake.
CHOCOLATE RASPBERRY CAKE
Raspberries can add a slightly tart flavor that balances the sweetness of chocolate.
You can spread a thin layer of raspberry filling between the cake layers.
Cover the outside with chocolate frosting.
Add a few fresh raspberries on top for decoration.
CHOCOLATE ORANGE CAKE
Chocolate and orange create a flavorful combination.
Add a small amount of finely grated orange zest to the cake batter.
You can also add orange zest to the frosting.
Finish the cake with a few thin strips of orange zest and chocolate shavings.
The citrus flavor can make the chocolate cake taste lighter and more aromatic.
CHOCOLATE MINT CAKE
For a refreshing variation, add a small amount of mint flavoring to the frosting.
Keep the amount moderate because mint can become overpowering.
Chocolate curls or dark chocolate pieces make attractive toppings for this version.
CHOCOLATE COFFEE CAKE
Coffee can enhance the flavor of chocolate.
A small amount of brewed coffee or espresso can be incorporated into the cake batter or frosting, depending on the recipe.
The result can have a deeper chocolate character without becoming strongly coffee-flavored.
CHOOSING THE RIGHT FILLING
The filling between cake layers can completely change the finished dessert.
Chocolate buttercream is the simplest option.
Whipped cream provides a lighter texture.
Cream cheese frosting adds a mild tanginess.
Fruit preserves can provide sweetness and acidity.
Caramel sauce can create a rich combination of caramel and chocolate.
Nut-based fillings can add texture and a roasted flavor.
Choose a filling that complements rather than competes with the chocolate cake.
CHOCOLATE BUTTERCREAM FILLING
Chocolate buttercream is a classic choice.
Spread a smooth layer between the cake layers.
Keep the thickness even so that the cake remains stable.
If you are making a tall cake, avoid adding an extremely thick layer of soft filling because it can make the upper layers slide.
WHIPPED CREAM FILLING
Whipped cream creates a lighter contrast to rich chocolate cake.
Use properly chilled cream and whip it until it reaches a stable consistency.
Do not overwhip it because the texture can become grainy.
For additional flavor, you can add vanilla or a small amount of cocoa powder.
CREAM CHEESE FILLING
Cream cheese frosting pairs beautifully with chocolate.
The slight tang of cream cheese balances the sweetness of the cake.
Spread it evenly between the layers.
If the filling feels too soft, chill it before assembling the cake.
CARAMEL CHOCOLATE CAKE
Caramel and chocolate are a classic combination.
Spread a thin layer of caramel between the cake layers.
Add chocolate frosting over the caramel.
You can also drizzle a little caramel over the top before serving.
Be careful not to use too much liquid caramel because an excessive amount can make the layers difficult to stack.
HOW TO CREATE A PROFESSIONAL-LOOKING CAKE
You do not need professional equipment to create a beautiful cake.
Start with even cake layers.
Use a flat cake stand or serving plate.
Apply a thin crumb coat first.
Chill the cake briefly.
Then apply the final layer of frosting.
Use an offset spatula to smooth the frosting.
For a simple finish, create gentle swirls around the cake.
You can also leave the frosting slightly textured. This often gives a beautiful homemade appearance.
USING A PIPING BAG
A piping bag can help create decorative borders.
Fill the bag with softened frosting.
Choose a simple piping tip.
Pipe small stars, swirls, or shells around the top edge of the cake.
You do not need complicated designs.
A simple border can make a homemade cake look much more polished.
CHOCOLATE SHAVINGS AS DECORATION
Chocolate shavings are one of the easiest decorations.
Use a vegetable peeler or suitable chocolate tool to create thin curls from a chocolate bar.
Sprinkle them over the top of the frosted cake.
You can also place larger curls in the center for a dramatic presentation.
ADDING FRESH FRUIT
Fresh fruit can make chocolate cake look beautiful while adding freshness.
Strawberries, raspberries, cherries, blueberries, and blackberries can all work well.
Place the fruit on the cake shortly before serving.
If using fresh fruit with cream-based frosting, keep the finished cake refrigerated when appropriate.
ADDING POWDERED SUGAR
For a very simple cake, you do not need frosting at all.
Allow the cake to cool completely and dust the top lightly with powdered sugar.
This creates a simple and elegant appearance.
You can serve the cake with fresh berries or a small amount of whipped cream.
SERVING CHOCOLATE CAKE WITH ICE CREAM
Warm chocolate cake and cold ice cream make a wonderful dessert combination.
Place a slice of cake on a serving plate.
Add a scoop of vanilla, chocolate, or another preferred flavor of ice cream.
You can finish the plate with a small drizzle of chocolate sauce.
This presentation is especially enjoyable for dinner parties and family desserts.
SERVING WITH WHIPPED CREAM
Lightly sweetened whipped cream can balance the richness of chocolate cake.
Add a small spoonful beside each slice.
You can sprinkle a little cocoa powder over the whipped cream for decoration.
PAIRING WITH HOT DRINKS
Chocolate cake pairs naturally with hot beverages.
Coffee can complement the deep chocolate flavor.
Tea provides a lighter pairing.
Hot milk is a simple family-friendly option.
For a special presentation, serve the cake with a warm beverage after dinner.
COMMON BAKING MISTAKES
Even experienced bakers can occasionally run into problems.
Understanding common mistakes can help you improve your results.
MEASURING FLOUR INCORRECTLY
Adding too much flour is one of the easiest ways to create a dry or dense cake.
Instead of pressing flour tightly into a measuring cup, spoon it gently into the cup and level the top.
If you have a kitchen scale, weighing ingredients is often more consistent.
OVERMIXING THE BATTER
Once the flour is added, mix only until the ingredients are combined.
Overmixing can lead to a tougher texture.
Do not continue mixing simply because you want the batter to look perfectly smooth.
A properly mixed batter does not need excessive beating.
USING OLD LEAVENING AGENTS
Baking powder and baking soda can lose effectiveness over time.
If they are too old, the cake may not rise properly.
Store them in a dry place and check their freshness regularly.
OVEN TEMPERATURE PROBLEMS
Every oven behaves slightly differently.
An oven that runs hotter than its displayed temperature can cause the outside of the cake to bake too quickly.
An oven that runs cooler may require a longer baking time.
If you bake frequently, an oven thermometer can help you understand your oven’s actual temperature.
OPENING THE OVEN TOO EARLY
Try not to repeatedly open the oven while the cake is baking.
Every time the door opens, heat escapes.
This can affect the baking environment and may contribute to a cake that does not rise properly.
CAKE STICKING TO THE PAN
Properly preparing the pan can prevent many problems.
Grease the pan thoroughly.
Line the bottom with parchment paper when possible.
After baking, allow the cake to rest briefly before removing it.
Run a thin knife carefully around the edge if necessary.
CAKE CRUMBLING WHILE FROSTING
If your cake is very crumbly, make sure it has cooled completely.
You can also chill the cake before frosting.
Applying a thin crumb coat can help trap loose crumbs.
Do not press the spatula aggressively into the cake.
Instead, spread the frosting gently across the surface.
FROSTING TOO SOFT
Soft frosting can be difficult to spread.
Place it in the refrigerator for a short period to firm it slightly.
If necessary, adjust the consistency by adding a little more powdered sugar.
Make changes gradually.
FROSTING TOO THICK
If the frosting is too thick, add a small amount of milk or cream.
Mix thoroughly before adding more.
Adding too much liquid at once can make the frosting runny.
CHOCOLATE GANACHE TOO THIN
If your ganache is too thin, allow it to cool for a while.
As chocolate ganache cools, it becomes thicker.
If it remains too thin, the proportions of chocolate and cream may need adjustment.
Do not pour very warm ganache over a soft frosting layer.
CHOCOLATE GANACHE TOO THICK
If ganache becomes too thick to spread, gently warm it until it becomes workable.
Avoid overheating it.
A smooth ganache should flow slowly but still be thick enough to stay on the cake.
MAKING THE CAKE AHEAD OF TIME
Chocolate cake is often a good dessert to prepare ahead.
You can bake the cake layers in advance and allow them to cool completely.
Wrap them properly and store them according to your intended preparation schedule.
Frost and decorate closer to serving time when practical.
Preparing the layers ahead can reduce stress when you are making a cake for an event.
BIRTHDAY CAKE IDEAS
A chocolate cake can easily become a beautiful birthday cake.
Cover the cake with chocolate frosting.
Pipe a decorative border around the top.
Add sprinkles or chocolate pieces.
Place a simple birthday message in the center.
You can also decorate with fresh fruit or small edible decorations appropriate for the occasion.
HOLIDAY CHOCOLATE CAKE
For holidays, change the decoration to match the season.
Use suitable sprinkles, chocolate decorations, nuts, or fruit.
A simple ganache finish can also create an elegant holiday dessert.
The basic chocolate cake remains the same while the decoration changes.
KIDS’ CHOCOLATE CAKE DECORATION
A simple chocolate cake can be decorated with colorful sprinkles or fun shapes.
Letting children help with safe decorating tasks can make baking more enjoyable.
They can sprinkle decorations over the frosting or arrange simple toppings.
Always supervise children around ovens, hot pans, knives, and other kitchen equipment.
HOW TO CUT CLEAN CAKE SLICES
For neat slices, use a sharp knife.
Wipe the knife after each cut if the frosting sticks to it.
If the cake is chilled, slicing can sometimes be easier.
Do not press down heavily on the cake.
Use a gentle cutting motion.
This helps maintain the layers and keeps the frosting from being pushed out.
PORTIONING THE CAKE
The number of servings depends on the size of the cake and how large you cut each slice.
For a celebration, smaller slices are often practical because the cake is rich.
For a casual family dessert, you can serve larger pieces.
Try to keep the slices relatively even so everyone receives a similar portion.
HOW TO MAKE A LESS SWEET VERSION
If you prefer desserts that are not extremely sweet, choose unsweetened cocoa powder and a darker chocolate for the frosting.
You can also balance sweetness with fresh berries.
However, do not drastically change the sugar quantity in the cake recipe without understanding how it affects the structure.
Sugar contributes more than sweetness in baking, so large changes can affect the final texture.
MAKING A RICHER CHOCOLATE FLAVOR
For a deeper chocolate flavor, use quality cocoa powder and chocolate.
A small amount of coffee can enhance the chocolate character.
Dark chocolate can provide a more intense flavor.
Chocolate shavings on top can add another layer of chocolate texture.
Remember that richness does not always mean adding more ingredients. Good-quality ingredients and proper preparation can make a significant difference.
MAKING THE CAKE EXTRA SOFT
The texture of a chocolate cake depends on the balance between flour, fat, sugar, eggs, and liquid.
Follow the recipe measurements carefully.
Avoid overbaking.
Allow the cake to cool naturally.
Store it properly after preparation.
A cake that is protected from air will generally maintain its texture better than one left uncovered.
HOW TO REFRESH LEFTOVER CAKE
If leftover cake becomes slightly firm after refrigeration, allow it to sit at room temperature for a short time before serving.
You can also serve it with whipped cream, ice cream, or a small amount of chocolate sauce.
These additions can make leftover cake feel like a completely new dessert.
TURNING LEFTOVER CAKE INTO CAKE TRUFFLES
If you have cake pieces that are too small or uneven to serve, you can transform them into cake truffles.
Crumble the cake into small pieces.
Mix with a suitable frosting until the mixture can be shaped.
Form small balls.
Chill them until firm.
Dip or coat them with melted chocolate if desired.
Decorate with sprinkles, nuts, or chocolate drizzle.
This is a creative way to reduce food waste while making another dessert.
CHOCOLATE CAKE PARFAIT
Leftover cake can also be used to create a layered dessert.
Cut the cake into small cubes.
Layer cake pieces with whipped cream and fruit in a glass.
Repeat the layers.
Finish with chocolate shavings.
This creates a simple dessert that looks attractive when served in individual glasses.
CHOCOLATE CAKE FOR SPECIAL OCCASIONS
A homemade chocolate cake can be adapted for almost any celebration.
For birthdays, use colorful decorations.
For anniversaries or formal dinners, choose a simple elegant chocolate ganache finish.
For family gatherings, serve the cake with fresh fruit and whipped cream.
For a weekend dessert, keep the presentation simple.
The versatility of chocolate cake is one of the reasons it remains such a popular homemade dessert.
FREQUENTLY ASKED QUESTIONS
Can I use a different type of pasta?
This recipe is about cake, so pasta is not relevant here. For the chocolate cake, however, you can choose different cake pan shapes depending on the recipe.
Can I make the cake without frosting?
Yes. A chocolate cake can be served plain with powdered sugar, fresh fruit, whipped cream, or ice cream.
Can I make the cake in one pan?
Yes, if the pan size is appropriate for the amount of batter. Baking time may need to be adjusted.
Can I make cupcakes from the same batter?
Many chocolate cake batters can be adapted into cupcakes. The baking time will generally be shorter, so begin checking them earlier.
Why did my cake crack?
A cracked top can happen when the oven temperature is too high or when the cake structure sets before the center finishes expanding.
Can I freeze chocolate cake?
Yes, properly wrapped cake layers can often be frozen. Allow them to cool completely before wrapping.
Can I freeze frosted cake?
Some frostings freeze better than others. Wrap the cake carefully and protect it from freezer odors.
Why is my chocolate cake dry?
Overbaking, too much flour, or incorrect ingredient proportions can contribute to dryness.
Why is my cake dense?
Overmixing, incorrect measurements, insufficient leavening, or oven-temperature issues can contribute to a dense texture.
Why did my cake sink?
Underbaking, opening the oven too early, or incorrect leavening proportions can cause the center to sink.
Can I use oil instead of butter?
Some chocolate cake recipes are specifically designed to use oil, while others are formulated around butter. Follow the recipe rather than replacing ingredients randomly because fats can affect texture and flavor differently.
Can I use milk instead of cream in the frosting?
It depends on the frosting recipe. Milk can be used to adjust consistency, but replacing a larger amount of cream can change the texture.
Can I add nuts?
Yes. Chopped walnuts, almonds, pecans, or hazelnuts can be added to the batter or used as toppings.
Can I add fruit?
Yes. Fresh berries, cherries, or other suitable fruit can complement chocolate beautifully.
FINAL BAKING CHECKLIST
Before baking, check that all ingredients are measured correctly.
Prepare the cake pans.
Preheat the oven.
Combine dry ingredients thoroughly.
Mix wet ingredients separately when required.
Combine wet and dry ingredients without excessive mixing.
Pour the batter evenly into the pans.
Bake according to the recipe instructions.
Check for doneness before removing the cake.
Allow the cake to cool completely.
Prepare the frosting.
Level the cake layers if necessary.
Apply a crumb coat.
Chill briefly if needed.
Apply the final frosting layer.
Decorate according to your preference.
Slice carefully and serve.
FINAL THOUGHTS
The ultimate homemade chocolate cake does not have to be complicated.
With simple ingredients, careful measurements, the correct baking temperature, and a little patience, you can create a soft and flavorful chocolate cake in your own kitchen.
The most important thing is to understand the basic principles behind the recipe.
Measure ingredients carefully.
Do not overmix the batter.
Avoid overbaking.
Allow the cake to cool before frosting.
Use a frosting consistency
that is easy to spread.
Keep the cake properly covered when storing it.
Once you understand these techniques, you can confidently experiment with different flavors and decorations.
You can create a classic chocolate cake for an ordinary family dinner, a beautiful layered cake for a birthday, a chocolate strawberry cake for a special celebration, or a simple one-layer dessert for a weekend treat.
The recipe can become a foundation for many different creations.
WHAT MAKES HOMEMADE CAKE SPECIAL
A homemade cake does not need to look perfect to be delicious.
Small imperfections are part of the charm of homemade baking.
The real reward is the aroma that fills the kitchen while the cake is baking, the excitement of decorating it, and the happiness of sharing it with family and friends.
Chocolate cake is especially satisfying because it combines familiar flavors with endless possibilities.
You can keep it simple or make it elaborate.
You can choose a smooth frosting or a rustic finish.
You can add fruit, nuts, chocolate pieces, caramel, or simply leave it plain.
There is no single correct way to enjoy homemade chocolate cake.
FINAL RECIPE SUMMARY
Prepare your cake pans and preheat the oven.
Combine the dry ingredients.
Mix the wet ingredients.
Combine the two mixtures carefully.
Pour the batter into prepared pans.
Bake until the cake is fully cooked.
Cool the layers completely.
Prepare your chocolate frosting.
Place one cake layer on a serving plate.
Spread frosting evenly over the first layer.
Add the second layer.
Cover the top and sides with frosting.
Decorate with chocolate shavings, fruit, nuts, sprinkles, or your preferred toppings.
Chill briefly if necessary.
Slice and serve.
ENJOY YOUR HOMEMADE CHOCOLATE CAKE
A great chocolate cake is more than just a collection of ingredients. It is the result of careful preparation, patience, and a little creativity.
Once you master the basic technique, you can adapt the recipe to suit your own preferences.
Try different fillings.
Experiment with decorations.
Add fresh fruit.
Create a rich ganache.
Make cupcakes.
Prepare a simple one-layer cake.
Or build a beautiful celebration cake with several layers.
Whatever version you choose, homemade chocolate cake is a timeless dessert that can be enjoyed in countless ways.
Take your time, enjoy the baking process, and do not be afraid to experiment.
The more you bake, the more comfortable you will become with understanding textures, adjusting flavors, and creating desserts that suit your personal style.
With practice, this classic chocolate cake can become one of the most reliable recipes in your homemade dessert collection.